
How to create an event
Use Event Manager to plan a tournament or dual meet that your team hosts. You fill in one form with the details. Your Team Manager then puts the event on your team calendar, gives you a hosting checklist, and lets you build a flyer.
Event Manager is for planning and the flyer only. Entries and payments still go through your usual registration site.
Step 1: Open Event Manager
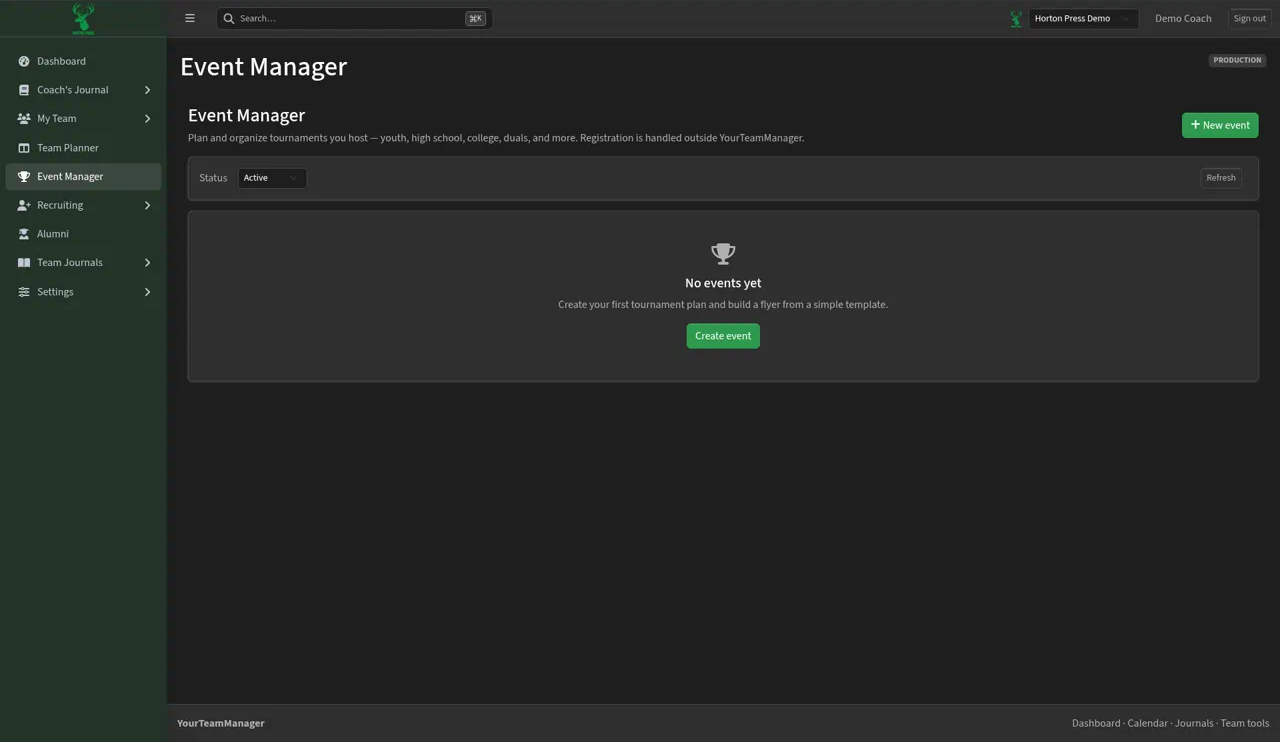
In the side menu, select Event Manager. The page says: “Plan and organize tournaments you host — youth, high school, college, duals, and more. Registration is handled outside YourTeamManager.”
- If you have no events yet, you will see “No events yet” and a Create event button.
- Use the Status filter to show Active events (the default), Cancelled events, or All. Select Refresh to update the list.
Step 2: Start a new event
Select + New event (top right) or Create event.
The New event form opens on the Event plan tab. The other two tabs are Flyer builder and Checklist. On the right, a Next step card reminds you to save your plan and then build the flyer.
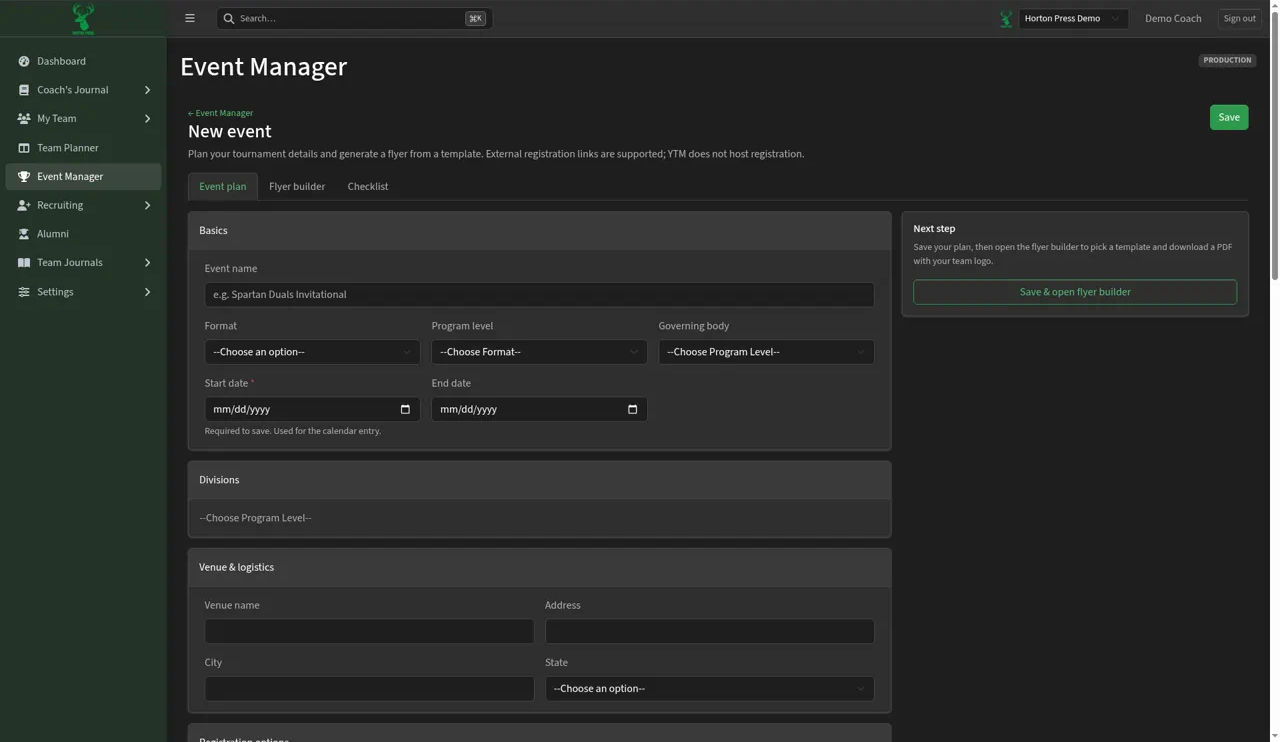
Start date is the only box you must fill in. Everything else is optional, so fill in what you know now and come back later for the rest. Anything you skip simply won't show on the flyer.
Step 3: Fill in Basics
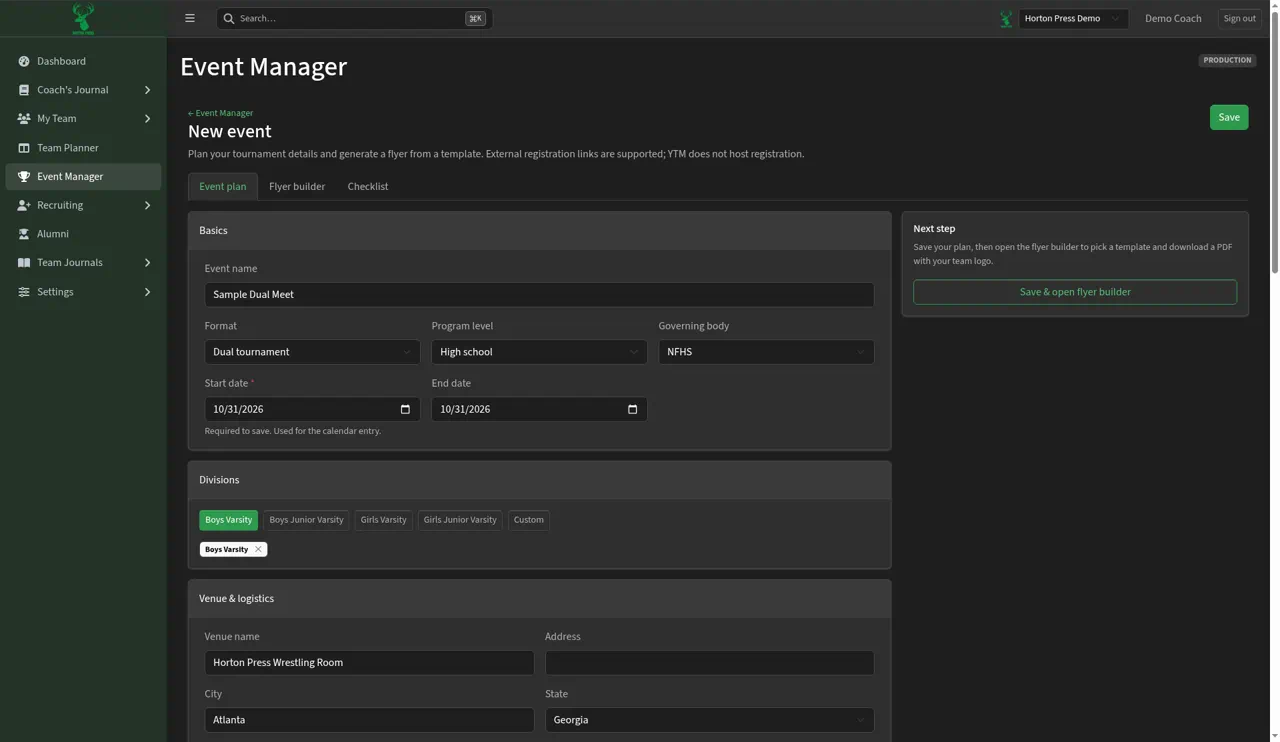
- Event name — for example “Spartan Duals Invitational.”
- Format — choose Individual tournament, Dual tournament, Team tournament, or Hybrid (individual + dual).
- Program level — this opens after you pick a format. Choose Youth, Middle school, High school, College, Open, or another level.
- Governing body — this opens after you pick a program level. For high school the choices are NFHS, USA Wrestling (USAW), AAU Wrestling, and National Prep Wrestling.
- Start date — required. The note under it says: “Required to save. Used for the calendar entry.”
- End date — fill this in for a multi-day event. For a one-day event, use the same date as the start date.
Step 4: Choose Divisions
The Divisions section appears once you pick a program level. For high school the choices are Boys Varsity, Boys Junior Varsity, Girls Varsity, Girls Junior Varsity, and Custom.
Click each division you are running to add it. To take one off, click the small × next to its name.
Step 5: Add the venue, fees, and tickets
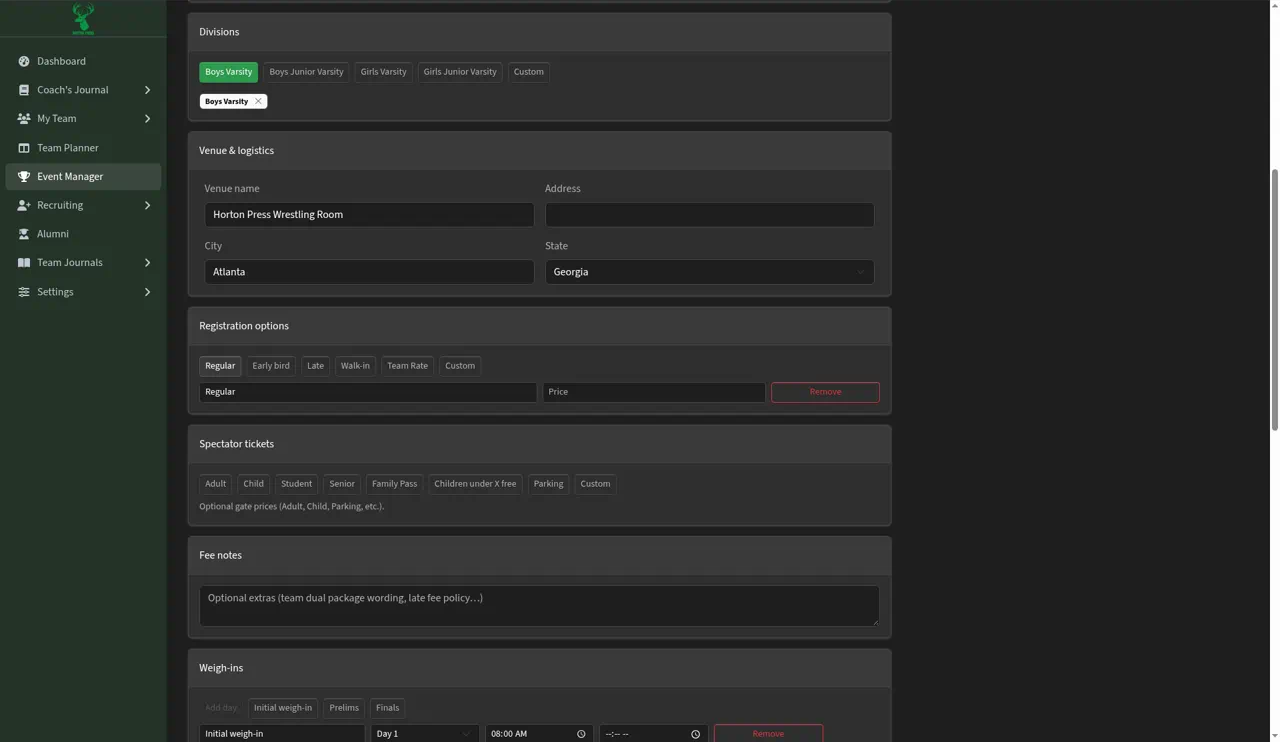
- Venue & logistics — fill in Venue name, Address, City, and State.
- Registration options — what athletes or teams pay to enter (the help text gives the example “Early bird $45”). Click a choice to add a row: Regular, Early bird, Late, Walk-in, Team Rate, or Custom. Each row has a Label and a Price. Use Remove to delete a row.
- Spectator tickets — optional prices at the gate. Choose from Adult, Child, Student, Senior, Family Pass, Children under X free, Parking, or Custom, and fill in the prices.
- Fee notes — any extra fee details, such as a team dual package or your late fee policy.
Step 6: Set weigh-ins and the schedule
Weigh-ins
- Click a preset to add a row: Initial weigh-in, Prelims, or Finals.
- Add day adds a weigh-in for the next day of a multi-day event. (On a one-day event, like the one in these screenshots, it shows greyed out.)
- Each row has a Label, Day, Start time, and End time, plus Remove. Presets fill in the label; you pick the day on each row.
- Use Weigh-in notes for anything else wrestlers need to know.
Schedule
- Works the same way. Use the buttons Doors open, Wrestling begins, Awards, and Concessions (or Add day) to add rows, and pick the day and times on each one.
- Use Schedule notes for extras, such as when mat assignments get posted.
Step 7: Add flyer details, contact, and registration link
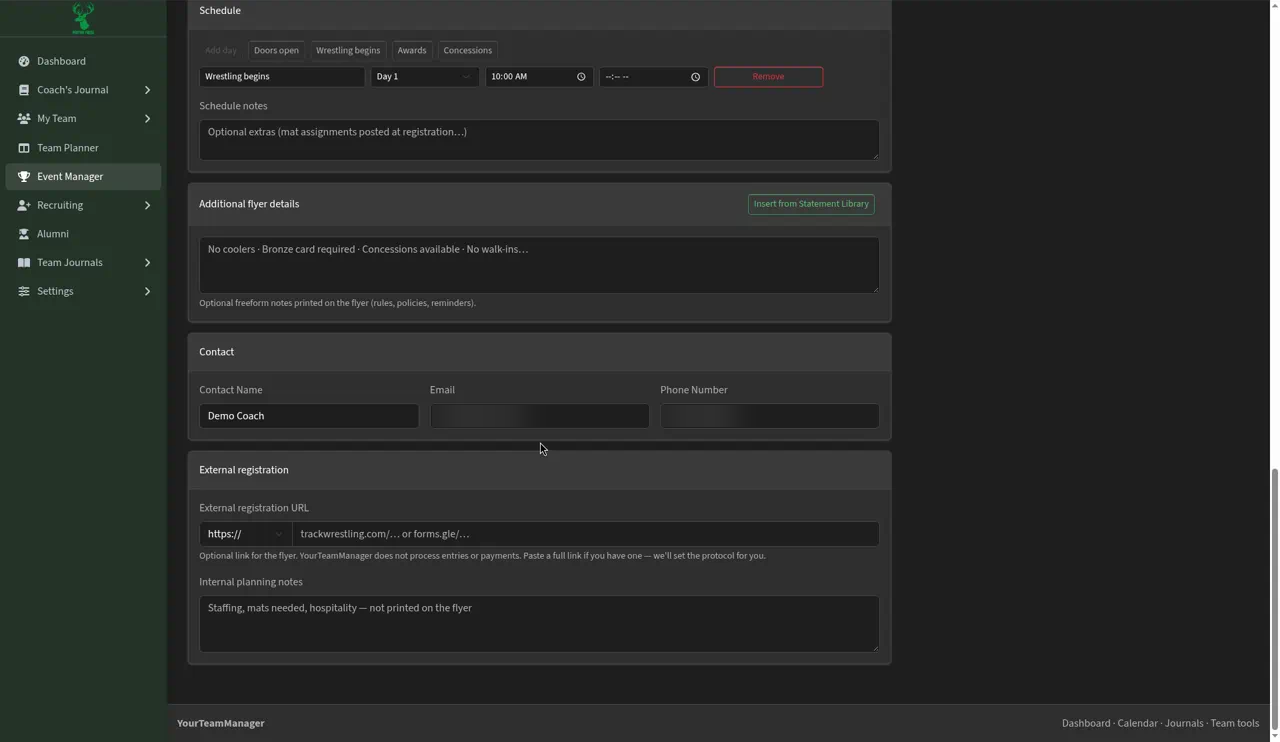
- Additional flyer details — short notes printed on the flyer, such as “No coolers · Bronze card required · Concessions available · No walk-ins.”
- To save typing, select Insert from Statement Library. A list of ready-made statements opens (the button changes to Hide Statement Library). Search with Search statements… or browse by category, then click a statement to add it. Each new statement goes on its own line.
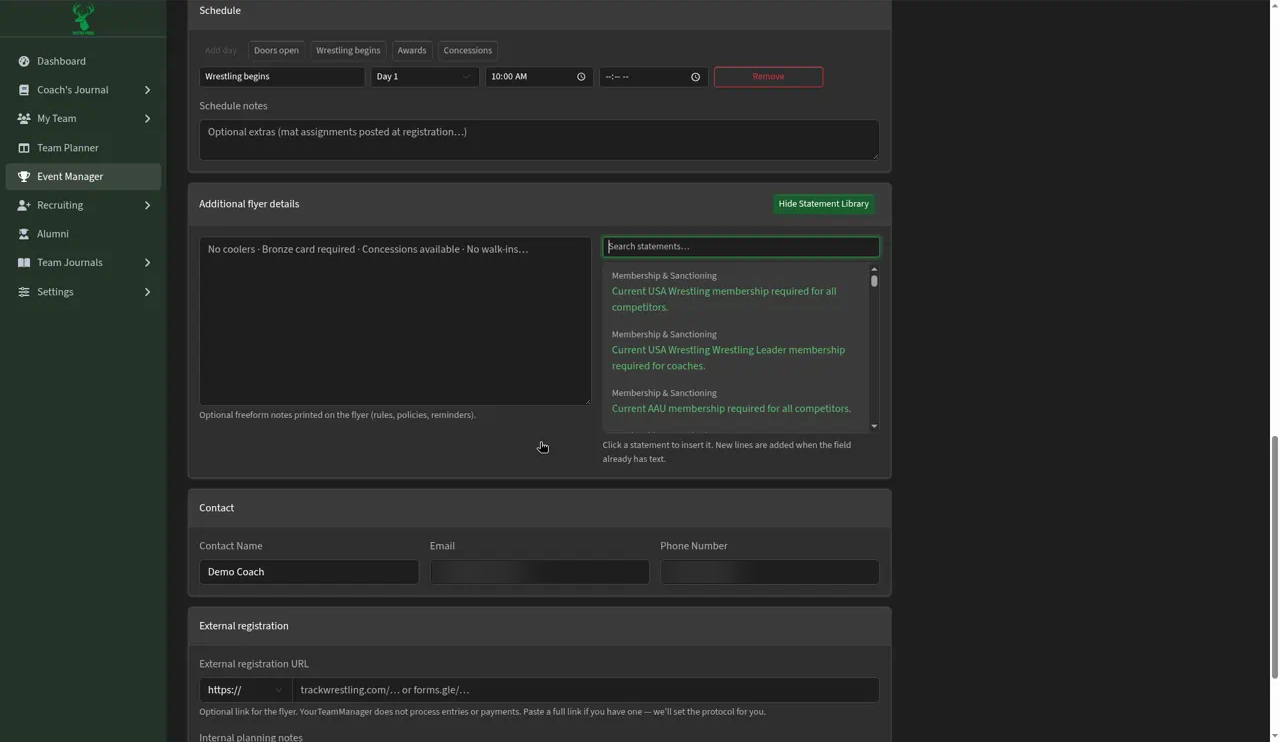
- Contact — Contact Name, Email, and Phone Number for the person families should reach out to.
- External registration — if athletes sign up somewhere else (for example TrackWrestling or a Google Form), paste that web link in the External registration URL box. Just paste the whole link as it is — the app takes care of the beginning part for you. Your Team Manager does not take entries or payments.
- Internal planning notes — notes just for your staff, like staffing, mats needed, or hospitality. These are not printed on the flyer.
To make a flyer for this event, see How to create and set up a flyer.
Step 8: Save
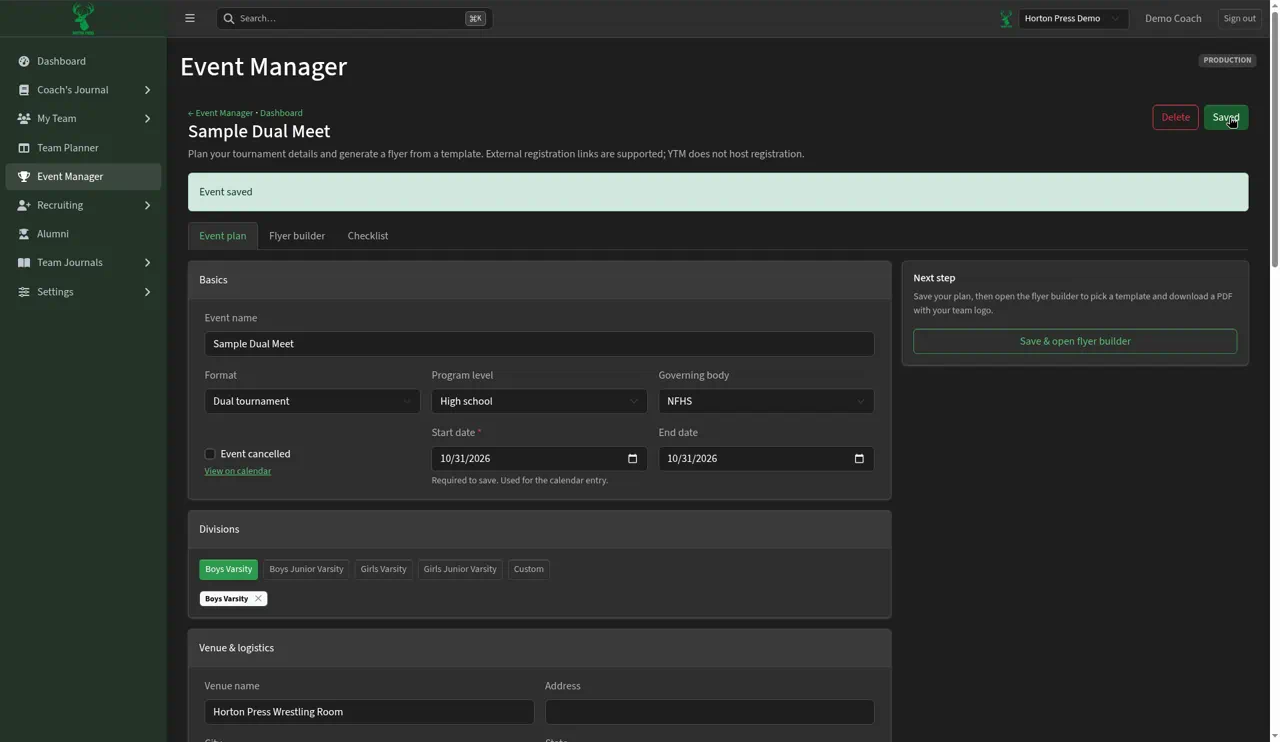
Select Save. You'll see an Event saved message, and the page switches to the event dashboard for your new event.
Or, if you want to go straight to the flyer, select Save & open flyer builder in the Next step card.
Step 9: Use the event dashboard
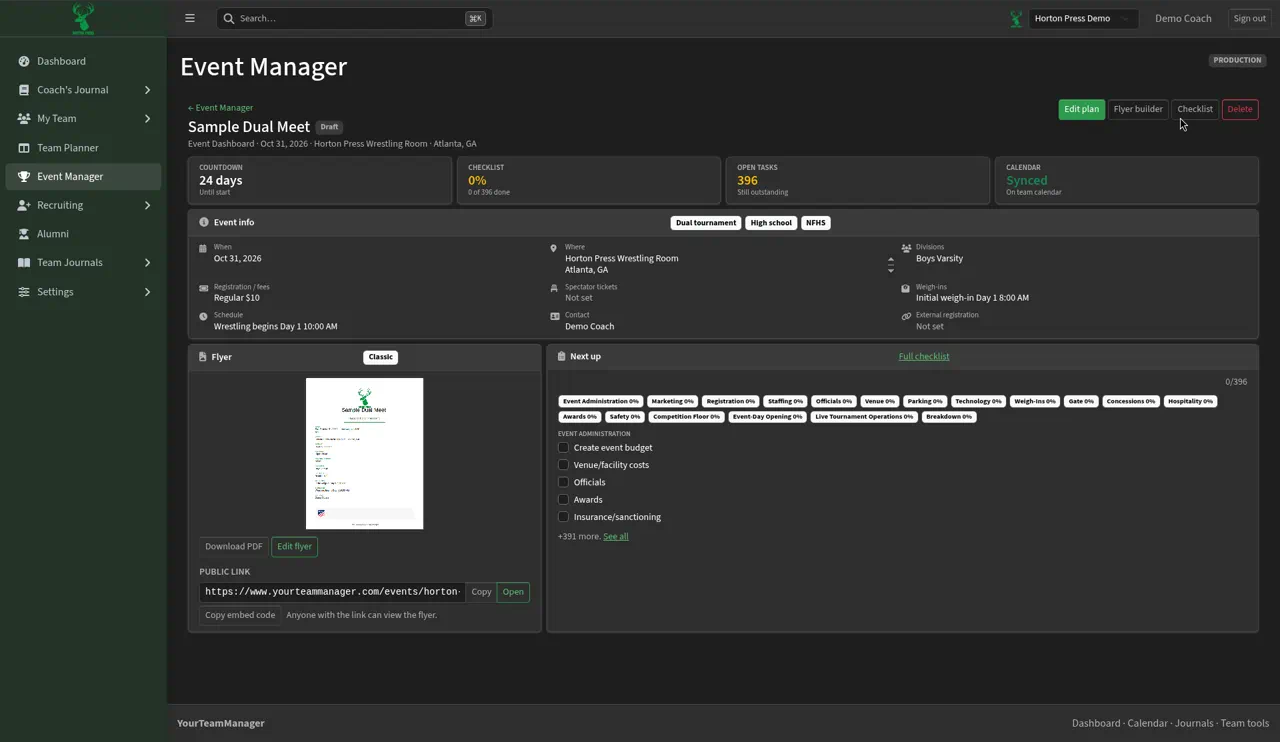
The top shows the event name with a Draft badge, then a line like “Event Dashboard · Oct 31, 2026 · Horton Press Wrestling Room · Atlanta, GA.”
Buttons
- Edit plan — reopen the form to change any details. When you change an existing event with Edit plan and select Save, you'll see Event saved and stay on the same page.
- Flyer builder — design and download the flyer.
- Checklist — open the full hosting checklist.
- Delete — remove the event (see Delete an event below).
Cards across the top
- COUNTDOWN — how many days until the event starts.
- CHECKLIST — how much of the hosting checklist is done.
- OPEN TASKS — how many checklist tasks are still open.
- CALENDAR — reads “Synced” and “On team calendar,” meaning the event has been added to your team calendar.
Event info lists When, Where, Divisions, Registration / fees, Spectator tickets, Weigh-ins, Schedule, Contact, and External registration. Anything you left blank says “Not set.”
Flyer shows a small picture of your flyer and which template it uses (for example “Classic”), with Download PDF (a printable copy of the flyer), Edit flyer, the PUBLIC LINK (with Copy and Open), and Copy embed code (for showing the flyer on your team website). As it says there, “Anyone with the link can view the flyer.” See How to create and set up a flyer.
Next up shows the next few tasks from the built-in hosting checklist. Select See all to view the whole list.
Where your event shows up
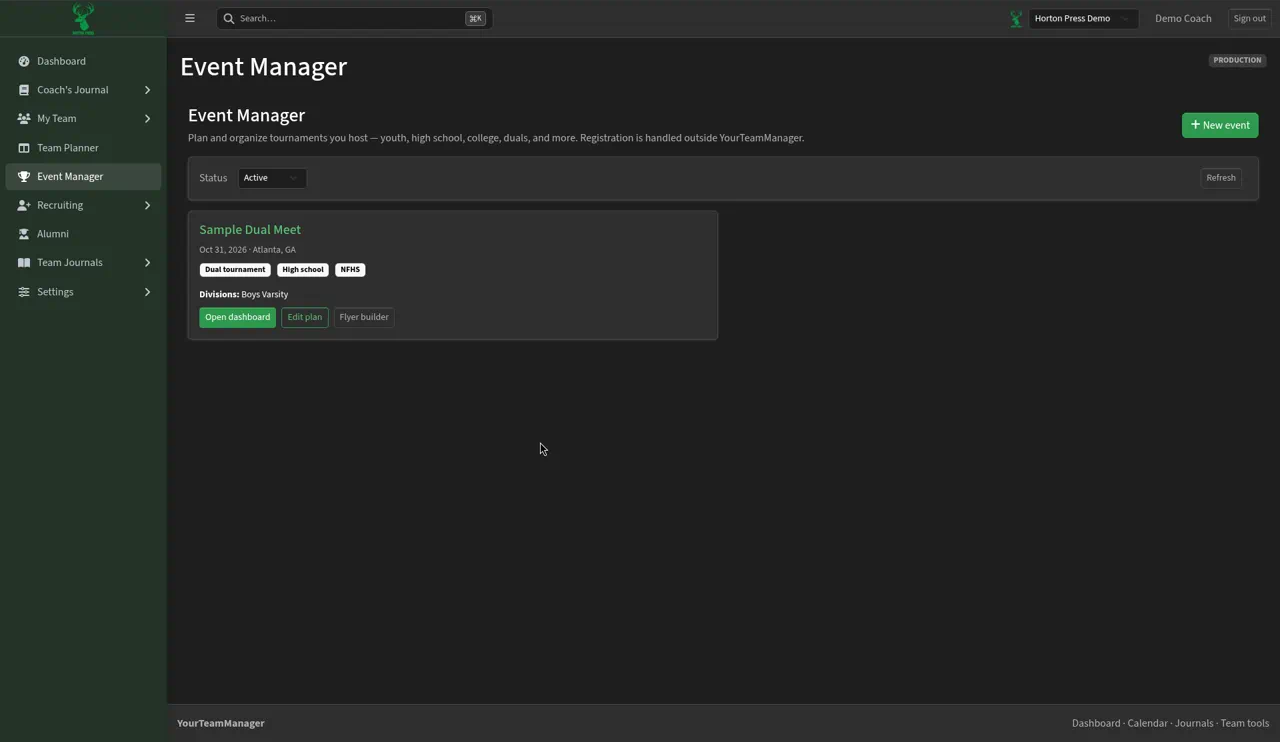
Event Manager list. Your event appears as a card with its name, date and city, small tags (format, level, governing body, and divisions), and the buttons Open dashboard, Edit plan, and Flyer builder.
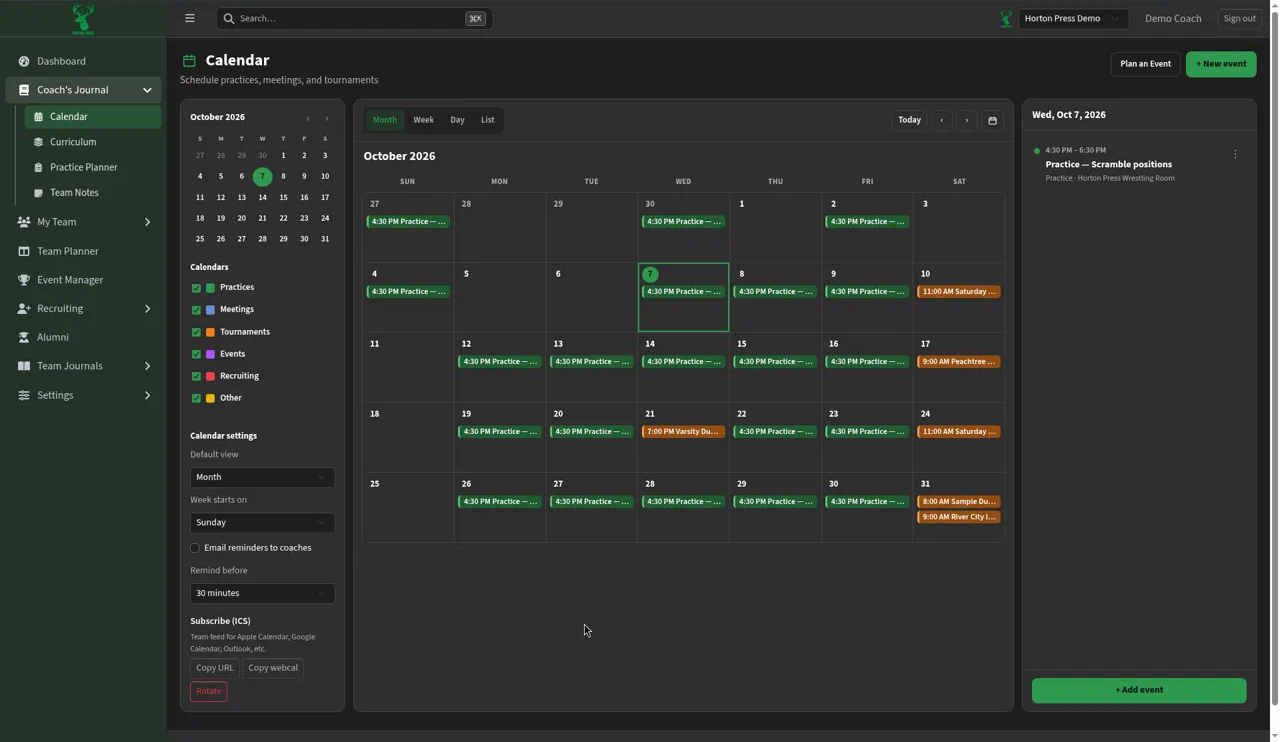
Calendar. The event shows on its date with its start time, in the tournament color. Click it to open the event dashboard. (The flyer's When line works the same way: it shows the date and the first time from your schedule, such as the first weigh-in.)
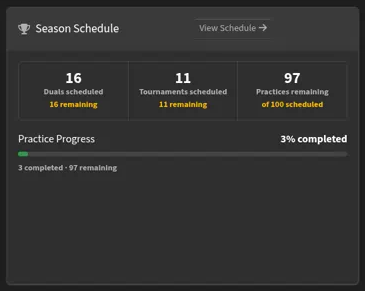
Dashboard. The Calendar card on your Dashboard lists your next few upcoming events, so your event shows there once it's one of the next few on the calendar. A dual tournament is also counted in the Duals scheduled number on the Season Schedule card.
Quick calendar event vs. hosted event
Not every event needs the full Event Manager form.
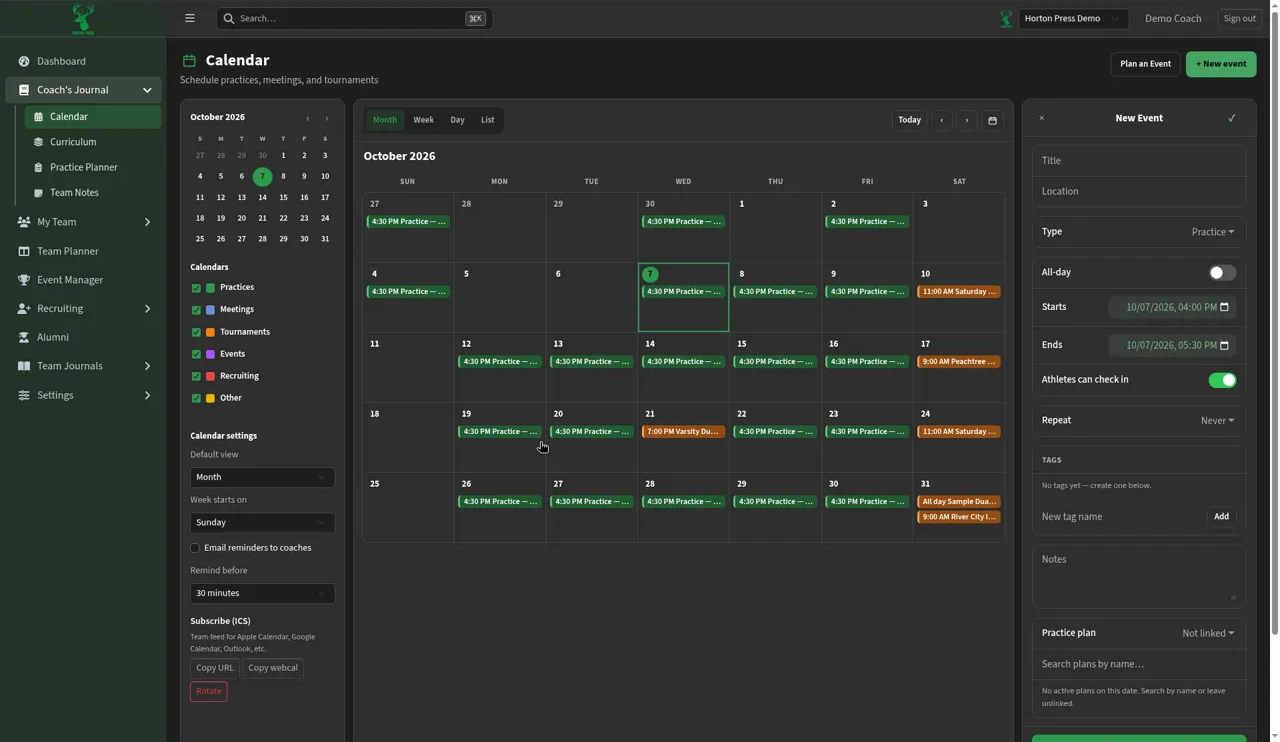
+ New event on the Calendar opens a simple New Event panel on the right side of the Calendar. Use it for everyday practices, duals, and meetings. It has:
- Title and Location
- Type — Practice, Small Group, Dual, Tournament, Competition, Event, Team meeting, Recruiting, or Other
- All-day switch, plus Starts and Ends
- Athletes can check in switch (on unless you turn it off)
- Repeat — Never, Every Day, Every Week, Every 2 Weeks, Every Month, Every Year, or Custom
- Tags and Notes
- Practice plan — search for a plan to link to it, or leave it unlinked
- Buttons Save and Save and Create a Practice Plan
Plan an Event on the Calendar opens the same Event Manager form described in this guide. Use it when you are hosting the event and want the full plan, checklist, and flyer.
Delete an event
- Select Delete on the event dashboard (or in the flyer builder).
- Confirm when asked: “Delete this event plan? This cannot be undone.”
- The button shows “Deleting…” and then you are back on the Event Manager list.
Deleting also removes the event from your calendar, and its flyer and public link stop working. Anyone you shared the link with will no longer be able to open it.