
How to create and set up a flyer
Every event you plan in Event Manager can have a one-page flyer. You pick the look; Your Team Manager fills in the details from your event plan. You can then download it, share a link to it, or print it.
To create the event first, see How to create an event.
Where the words on the flyer come from
The flyer builder has no boxes for typing. Everything printed on the flyer comes from the Event plan tab: the event name, dates, venue, fees, weigh-ins, schedule, additional details, and contact.
To change what the flyer says, open the Event plan tab (or select Edit plan on the event dashboard), make your changes, and select Save. Then come back to the flyer builder.
Step 1: Open the flyer builder
There are several ways in. They all open the Flyer builder tab for your event:
- Save & open flyer builder on the new event form
- Flyer builder or Edit flyer on the event dashboard
- Flyer builder on the event's card in the Event Manager list
At the top of the page you will see the event name and two buttons, Delete (deletes the whole event) and Save.
Step 2: Pick a template
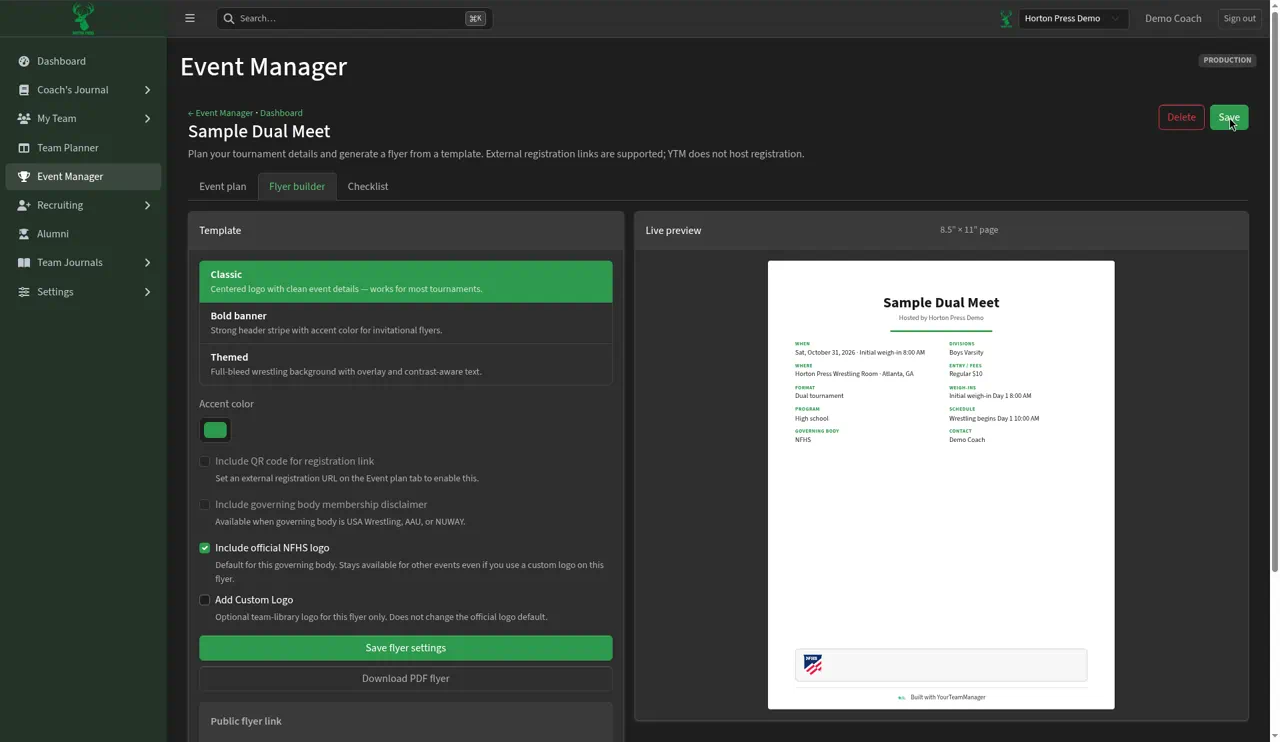
Choose one of three looks under Template:
- Classic — “Centered logo with clean event details — works for most tournaments.”
- Bold banner — “Strong header stripe with accent color for invitational flyers.”
- Themed — “Full-bleed wrestling background with overlay and contrast-aware text.” In plain words: a wrestling picture fills the whole page, and the words are set up to stay easy to read on top of it.
Step 3: Choose colors (and a theme)
Classic and Bold banner have one setting, Accent color. Click the color square to choose your color. On Bold banner, it colors the stripe across the top.
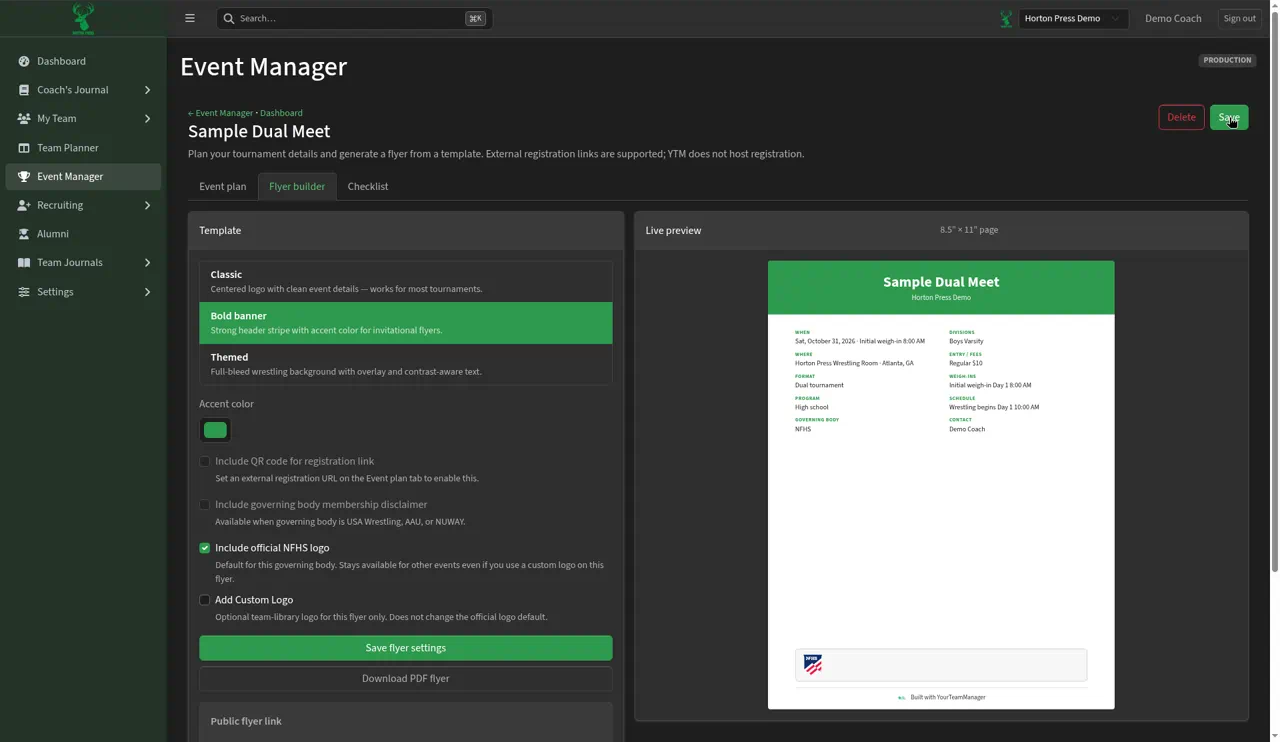
Themed has three settings:
- Theme — the background picture: Finals, Mat, Team, or Wrestlers.
- Background color — Blue, Green, Orange, Purple, Red, White, or Yellow.
- Overlay opacity — a slider. The overlay is a dark layer between the background picture and the words. The help text says: “Dark veil between the background image and text. Higher values improve readability on busy images.” Slide it higher if the words are hard to read.
Step 4: Choose the extras and logos
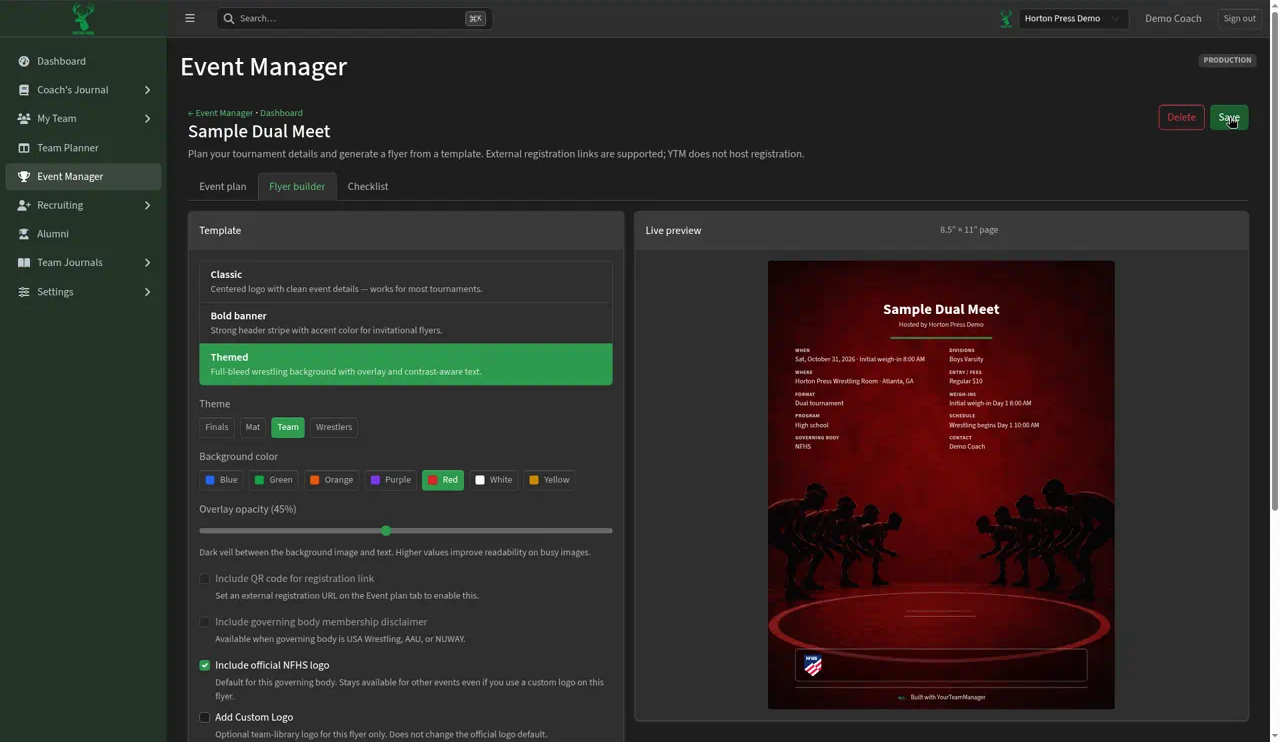
Check any of these boxes:
- Include QR code for registration link — adds a square code people can scan with a phone camera to go straight to your sign-up page. You can only check it after you add a sign-up link in the External registration URL box on the Event plan tab.
- Include governing body membership disclaimer — adds a membership notice to the flyer. As the help text says, it is “Available when governing body is USA Wrestling, AAU, or NUWAY.”
- Include official NFHS logo — adds your governing body's official logo to the flyer. The name in this label matches the governing body you picked (for example NFHS). This box starts checked (for example on NFHS events), so the official logo for your governing body is included. Adding a custom logo to one flyer doesn't change this setting for your other events.
- Add Custom Logo — use a different logo on this flyer only, for example a state association logo. It doesn't change your normal default.
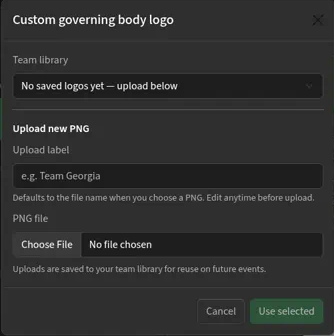
When you check Add Custom Logo, a Custom governing body logo box opens:
- Pick a logo you uploaded before from the Team library list, or
- If the library is empty, you will see No saved logos yet — upload below.
- Upload a new one under Upload new PNG: type a name in Upload label (for example “Team Georgia”), then select Choose File next to PNG file to pick the picture from your computer. It must be a PNG picture file.
- Uploaded logos are saved to your team library so you can reuse them on future events.
- Select Use selected to put the logo on the flyer, or Cancel.
Step 5: The Live preview and Save flyer settings
The Live preview on the right gives you an idea of the flyer on a standard letter-size page (“8.5″ × 11″ page”). It lays out the event name, “Hosted by” your team, When (the date plus the first time from your schedule, such as the first weigh-in), Where, Format, Program, Governing body, Divisions, Entry / fees, Weigh-ins, Schedule, Additional details, Contact, and “Built with YourTeamManager” at the bottom. Your team logo appears on the downloaded PDF and the public flyer page.
Select Save flyer settings to keep your template, colors, and logo choices for next time. The button changes to Saved.
Step 6: Download the PDF flyer
Download PDF flyer saves your choices and makes the PDF for you — you don't need to press Save flyer settings first. You get a one-page PDF file (a printable file) named after the event, like “Sample-Dual-Meet-flyer.pdf.”
Open the PDF to check it before you share or print it.
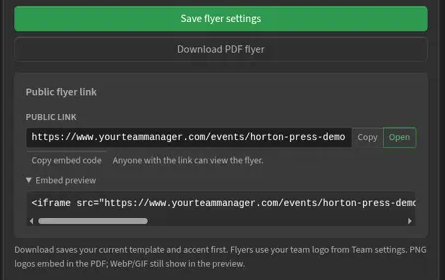
About the logo, the note under the buttons says: “Download saves your current template and accent first. Flyers use your team logo from Team settings. PNG logos embed in the PDF; WebP/GIF still show in the preview.” In plain words:
- The flyer uses the team logo you uploaded under Settings → General.
- If that logo is a PNG picture file, it will show up on the downloaded flyer.
- Other picture types (WebP or GIF) may not make it onto the downloaded flyer. For best results, upload your team logo as a PNG.
Step 7: Share the public link
Under Public flyer link (and in the Flyer card on the event dashboard) you will find the PUBLIC LINK:
- Copy copies the link so you can paste it in a text, email, or social media post.
- Open opens the flyer page so you can see what others will see.
- As the page says, “Anyone with the link can view the flyer.” No account is needed.
The flyer page shows your team name, the event name and place, a Download PDF button, and the flyer itself.

Copy embed code is optional. It copies a short piece of code that lets the flyer appear right on your team website. If someone else runs your website, send it to them and they will know where to put it. You can see the code by opening Embed preview.
If you delete the event, the public link stops working.
Step 8: Print the flyer
There is no print button in the flyer builder itself. To print:
- Open the PDF you downloaded, or open the public flyer page.
- Click the printer icon shown with the flyer, or use your computer's usual print command (Ctrl+P on Windows, Command+P on a Mac).
- Choose your printer and print. The flyer is sized for regular letter paper.